Showing posts with label DIY. Show all posts

Jan 30, 2012

Fairylike

Examinations are over!!! Freedom!! :D Physiopathology, neurosciences, human genetics and microscopy are (hopefully) now part of my past! ;)

I have lots of pictures coming up! After having saved some money, I finally got my new camera... :D
(This photo was not taken with my new camera!)


Photobucket

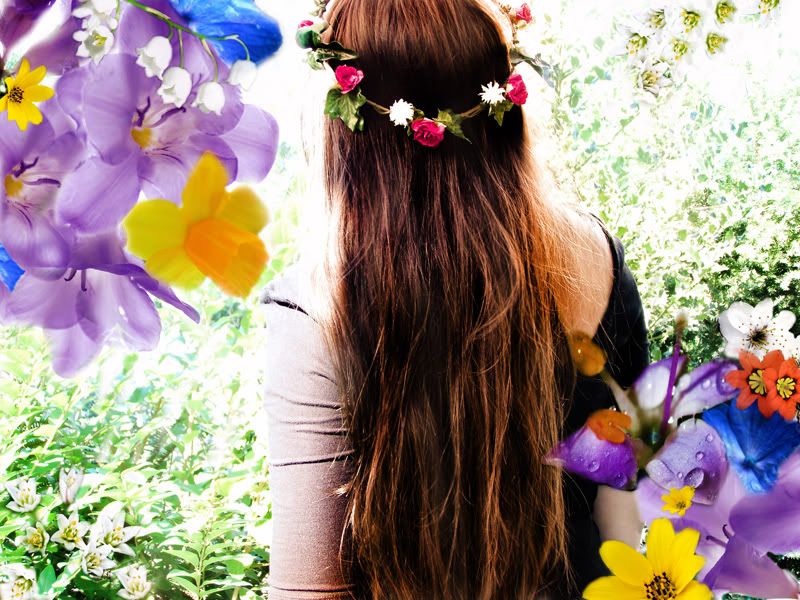
Dress from LaRedoute, DIY flower crown

Dec 21, 2011

Moustache

Homemade cupcakes and hairy nail art!

Photobucket
My own nails, my own cupcakes

Oct 13, 2011

Garden of Flowers

Time to post some more!!

My new lessons have started a while ago… Neurosciences, physiopathology, human genetics,… It will be a busy year full of studying! =D (Why did I put a smiley face there?)

Ow, I went to River Island student shop-in! And I met Annebeth!!!! She is SUPER kind, beautiful and stylish! Plus, her pink hair looks even better in real life! ;)

My pictures for today: Flowers, flowers and flowers! Nostalgia for summer…
Flower crown is my own DIY shizzle ;D

Daaaamn, I’m really too tired to write anything interesting after a day full of neurosciences!


Photobucket


Photobucket


Flower crown: DIY
Dress: Pull and Bear


Jul 23, 2011

Nail Art: Japanese Blossom

Photobucket

My take on the whole cherry blossom thing! =D

(I did both my hands myself, like always + these are my own nails ^^)

By the way: I noticed that people who follow me on bloglovin' don't get any more email updates from my blog! I'm really sorry about that and I don't know why it happens!


Jul 19, 2011

Sunny side up?


Photobucket

 Photobucket
 Pants: LaRedoute, Shirt: Zara, Shoes: Ash, Crown: DIY

Aloha!

Here are the original pictures (->one of them was for a cover of Mode Republic)!

I don’t feel like writing a happy blog post now… I’m actually always positive and my motto is ‘sunny side up’, but so much has happened these past months!
I really don’t know what the hell is happening to the world!

Well, I think I better start explaining what happened:
A few months ago I was chilling in the park (near the place where I live). It was sunny, LOTS of children were playing at the playground and my boyfriend and I sat on a bench just eating candy and talking about our vacation plans. All of a sudden a few boys started to bully us (yelling stupid things, asking stupid things,… you know: acting stupid!). But that happens quite a lot, so we ignored them. Like always.
They continued talking to us; one of them even started screaming things next to my ear! Then the bullying went to far… they were throwing sticks and stones to my boyfriend’s head and they even hit him a few times with a branch. So of course he stood up and got angry, telling them to stop acting like that. The next thing I knew was that one of the boys just hit him in the face for no reason… (I clearly want to indicate that my boyfriend didn’t start the fight, he said nothing aggressive nor had an aggressive body language)
I won’t go in to detail too much, but we both tried to calm down the boy (he acted like he was possessed or something…?). So my boyfriend didn’t punched him once, cause that would set the guy off even more (plus my boyfriend is +18, so if the other boy was a minor we, as a victim, would be in some serious trouble and not the boy who started this… That doesn’t make any sense right?)
I luckily got out of the fight unharmed; I really tried to protect my boyfriend! I remember grabbing his face, so that the idiot would stop hitting him and would beat me instead (but he didn’t). One boy did spat in my face… really unnecessary…
To make this long story short: we did call the police even though the teachers (remember all the children that were playing at the playground? Well, they ALL saw what happened… and their teachers were with them) said we should get out of the park and act like nothing happened…
I found the boys while we were driving in the police car. They got arrested, but we still didn’t heard anything from the police since then. I don’t know whether they got punished, or if they paid for my boyfriend’s doctors visit (his nose was possibly broken)… When they got arrested they lied about what happened (I was attacking the boy who spat my face? Yeah, I’m really going to attack another gang member if his friend is beating my boyfriend… really believable…). So I’m guessing that nothing happened to those idiots…

And yesterday my boyfriend got mugged (at the park near his house, again: lots of children were playing) by a couple of assholes… So now I’m really pissed!
I’m pissed because I can’t walk the street on my own without being called a whore (or other alternatives), I can’t walk the street on my own without being followed, I can’t wait for my bus at the bus stop without being addressed, I have to act like I’m phoning someone so I won’t be hassled,… I’m just really scared right now. I finally got my confidence back up again to go out and then they do such a thing to my boyfriend… 


So this is actually the reason why I stopped blogging for a while (+exams of course). The first weeks I didn’t feel like blogging, and now, I don’t have the guts to go out to take pictures…
I am really sorry if this post sounds depressing! It just feels so good to write this all off! Writing heals… ^^

So now I want to know: did something like this ever happened to you? To your friends? … What did you do to get over it? + Do you put some stuff in your handbag to protect yourself? Because I really want to have something with me, just in case… But things like pepper spray are illegal in Belgium… So I need some ideas! =D


Jul 3, 2011

Nail Art: Mumbai

Aloha!

I designed this nail art for a contest and guess what? I was one of the winners! =D

So here's the explanation:

I was inspired by Mumbai, India.
Mumbai is perhaps better known as "Bollywood", where all the famous Indian movies are made.
I wanted to reflect the crowdiness, the variety, tradition and richness of Mumbai on my nails.

I will discuss each nail
separately (in the photo from top (pink) to bottom (thumb)):
  • Pink: I based this one on traditional wall paintings of Indian women, very simple and yet so detailed.
  • Ring finger:  Indian Henna (or Mehndi)!
  • Middle finger: The middle finger was inspired by a beautiful Indian belt, with large turquoise stones, that I own.
  • Index finger: This finger represents a sari (the scarves and dresses that women wear).
  • Thumb: Of course I wanted something architecturally. This is the gate of Mumbai, a well known building.
Photobucket

Apr 28, 2011

Superiocho

Aloha!

Euheum… This is something from a while ago…

I went to Venuez, a style and hospitality event.
But, there is more! I was one of the chosen ones to go see the Bacardi Legacy Competition! About 20 people were invited to attend this competition! ^^
The three best bartenders of Belgium battled for their spot on the plane to go to Barcelona, where the ultimate final would take place.
They had to come up with a cocktail that could be the new Mojito at parties and other events!
I’m happy that I wasn’t one of the judges; I think they had a really hard time deciding who the winner should be… Ultimately, Piotr Kuzmicki won with ‘superiocho’; a cocktail that contains lime juice, ginger, lemongrass, peach bitters, vanilla syrup, Bacardi superior and Bacardi 8 Años.

Photobucket

Photobucket

So, I wore:
  •  A reaaaaaally expensive dress! This dress cost $400! But I bought it for 50 mhuhahahaha! I looooooove sales! ;D
  • My DIY ear cuff thingy
  • My new 'kick ass' boots (they are sooooo awesome!)

Think I’m gonna treat myself a cocktail now!

Dec 24, 2010

Happy Birthday to me!

On the 23rd of December, I turned 19! Hooray! *Birthday horn sound*
+ I love my boyfriend! 3 years!!! =D
I’ll post my outfit (or at least one of them) next week! ^^ I’ll let you enjoy your holidays first. ^^

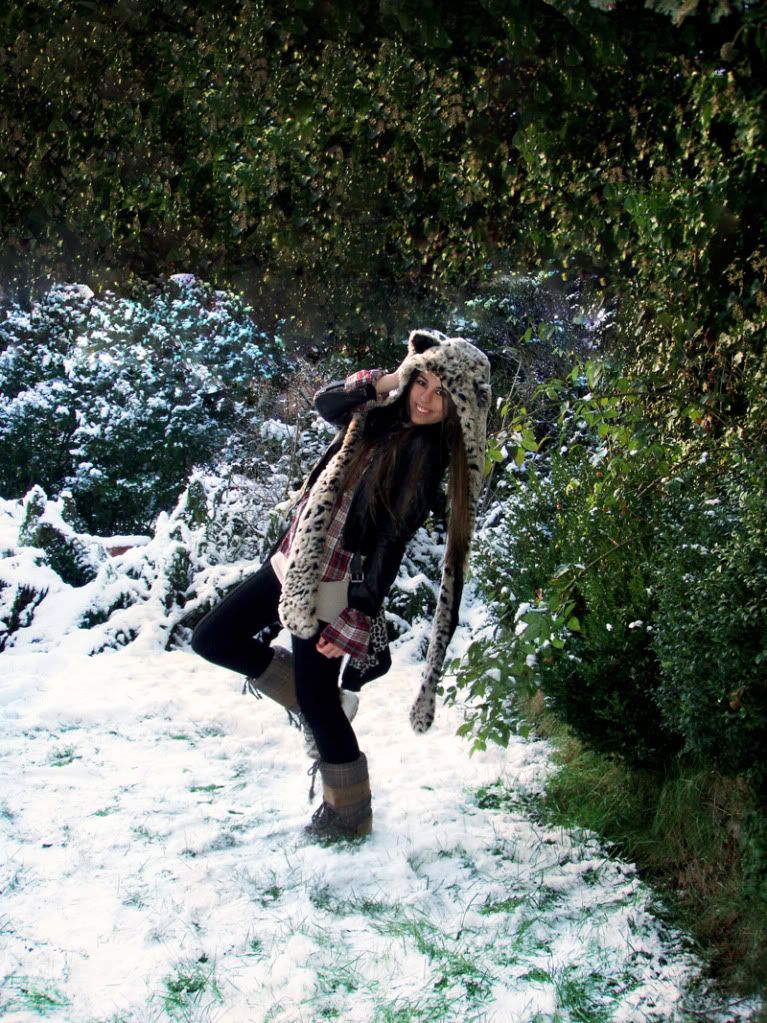
So this is THE premiere! Tadaaaaaa: My SELFMADE (100% pure manual labor) hat/hood animal ear thing! =D Whatever you may call it; it’s warm. And that’s exactly what I need right now! ^^ There’s just one thing missing: the paws. I wanted to make some fluffy feet for my hood, but it was sooooo damn cold and I couldn’t resist! I had to wear it! =D So I’ll keep you updated and I’ll let you know when that beast is the proud owner of some awesome paws!

Ow, before I forget! I have to prepare my exams during the holidays… It’s really important to me (and I’m scared as hell about an oral exam of cell physiology…), so I’ll try to post as often as I can (and I promise: no crappy stuff ;D). But please, don’t start crying if I don’t update for about a week! =D I’ll be back…

Merry Christmas!!! =D Or whatever you like to celebrate! ^^


Photobucket

Photobucket

Photobucket

Photobucket
Jacket: H&M, Shirt: Pull and Bear, Pants: H&M, Boots: Moonboots, Hood: 100% DIY! =D


Oct 22, 2010

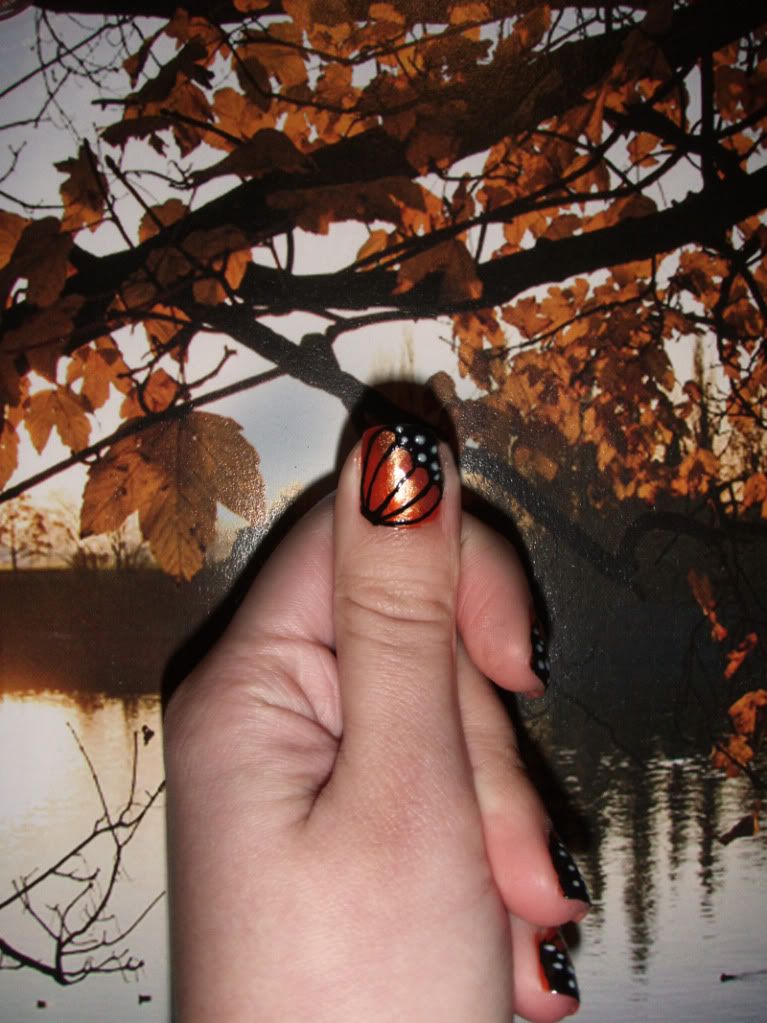
DIY: Butterfly Wing Nail Art

Photobucket

As promised: Butterfly wing nail art tutorial!  ^^
Maybe for Halloween...?

To make some things clear (after hearing it a lot today…): Yes, those are my own fingernails. Yes, I paint my nails all by myself. =D


Hope I’ve made these steps clear! If you have any questions, please ask!


What do you need to achieve this look?
* 2-3 shades of orange nail polish (or you could also try light and dark blue, yellow, red,…)
* Black nail polish
* White nail polish
* Toothpick or eyeliner pencil


How to do it?

Step 1
Firstly, you should give your nails at least 2 coats of orange. Use a darker shade of orange (or even two shades) to give it a more realistic wing effect.  You should try to let the 2 or 3 colors blend into each other.
Let it dry! This is very important! ;)
Photobucket

Step 2
Secondly, you take the black one. Paint a sort of triangular shape at the corner of your nails. Draw pointy ‘arches’ with the pencil starting from the triangle you painted.
This is the tricky part: You should connect the arches with an imaginary point at the other end of your nail.
(<- Is this sentence clear enough? =p)
Photobucket

Step 3
When the black nail polish is dry, start painting some white dots!
Photobucket

Step 4
Finish with shiny topcoat!


Sep 21, 2010

Crowned

Photobucket

Photobucket

Photobucket

First of all, a brief comment:
I PASSED ALL OF MY EXAMS! =D
So I can start my new year as a bachelor in biomedical sciences next week ^^

Secondly, I’m out a lot lately (enjoying this week of freedom ^^)… And last weekend I went to surprise a friend of mine. He’s quite ill for a long time now, so his girlfriend organized a little party for him!
I had nothing to do during that day, so I switched on the creative side of my brain and started ‘DIY-ing’! =D
I bought a bag full of lovely feathers, searched for something that could look like a headband and rummaged trough my ‘arts and crafts box’. Eventually I found a sac filled with lots of gemstones (a thrift from a while ago!). 
I warmed up my old friend: mister glue gun… and there you go: a stylish feather crown with gems is born! =D I decided to wear my colorful, feather inspired H&M dress and some black socks (although my idea was not to let them slide down my leg… bad socks! haha =D) with it.
I had a great time that night at the party (and my boyfriend and I took some pictures before we arrived) ^^

Ow! I just remembered something! I had this weird dream! =O I went shopping in New York with Annebeth from The Styling Dutchman, Vanessa from The Haute pursuit and Cocorosa from My precious confessions! To bad I couldn’t keep the clothes I dreamed about! xD

Aug 18, 2010

DIY: Fairy Flower Nail Art


Photobucket 

So I tried something new here!
I’ve used a tiny eyeliner brush to draw the design on my nails (instead of using a toothpick). I got it for free with some kind of fashion magazine... You know, those free things they offer, but that stuff is always crappy or ugly (or both) =D
So this time I had another beauty product that would probably end up in the bin… But then I wondered… ‘Could I use the little brush for nail polish,  or is it only for cheap eyeliner?’ The answer is yes, you can use it for both! So let’s recycle free beauty products!!! =D

Here we go:

What do you need to achieve this look?


* Soft, pastel nail polish (like: OPI, Done out in deco)
* All kinds of dark pink (like magenta, plume,…)
* Glittery things! A magenta glitter nail polish + A soft pink glitter nail polish
* Tiny brush (or toothpick)

How to do it?

Step 1

Firstly, you should give your nails at least 2 coats of the pastel color. Let it dry!

Photobucket
Step 2

Secondly, you take the lightest pink color and you dip the brush in the nail polish.
This color is the base for the flower, so you draw the petals. 

Photobucket
Step 3

Thirdly, we are trying to add some texture to our flower, so we’re gonna draw some stripes across each petal. Use all the darker pink tones you own, like magenta and plume. Also go over it with the glitter nail polish to make it more magical! ^^
You could also add a diamond as the center of the flower (I didn’t have any stones anymore, so I just used a lot of glitters =D)

Photobucket

Step 4

Now, the magic begins! =D
We are going to paint curls coming out of the flower, with a light pink glitter polish! ^^
You should leave your other nails simple, I only did a french manicure with the glitter polish!
Finish with a shiny topcoat!
(There isn’t any topcoat on my nails yet, because it takes some time for the curls to dry!!!)

Photobucket

Jun 8, 2010

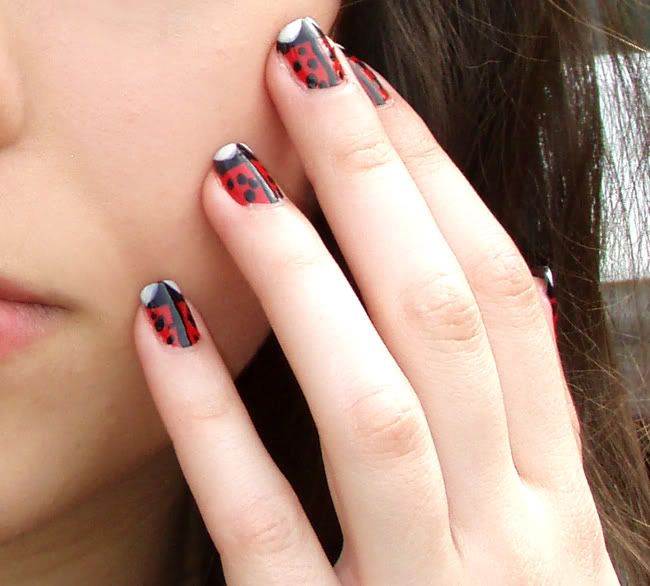
DIY: Ladybug nailart !


Photobucket

 Just like last time: 4 easy steps to get these cute ladybugs! ^^


What do you need to achieve this look?

* Red nail polish (bright red)
* Black nail polish
* White nail polish
* Topcoat
* Toothpick (if it's easier for you)


How to do it?

Step 1: Give your fingernails 2 coats of bright red nail polish.

 Photobucket

Step 2: When the red layer is dry, do a 'french manicure' in black. You now have a black tip! Draw a black line from the black tip towards your finger. Now you can give the ladybug her black dots! =D Make them big and small! (You could do this with a toothpick)

 Photobucket

Step 3: Only do this step when the black tip is completly dry!!! Paint 2 white eyes. This should be a 'half egg' shape. =D

Photobucket
 
Step 4: Finish with topcoat! ^^

Hope I’ve made everything clear! If you have any questions, please ask! =D


May 30, 2010

DIY: Leopard print nails!


Do you want leopard nailart just like the one on my nails?
Well, it ain't that hard!
Follow these 4 simple steps!


I’ve ‘painted’ my righthand to make clear that it’s possible to do this look with my lefthand (I’m righthanded)!


What do you need to achieve this look?
  • Gold nail polish
  • Very dark brown nail polish (you can also try black!)
  • A dark (brown) orange nail polish
  • Toothpick

Let's get started!


How to do it?

Step 1
Firstly, you should give your nails at least 2 coats of gold. Let it dry! This is very important! ;)

Photobucket


Step 2
Secondly, you take the dark brown color and you dip the toothpick in the nail polish. Be very careful!!! You should have a little brown tip on the toothpick. This brown tip is your pencil now ;) There are only two thing to write: the letter ‘c’ (make the letter ‘ugly’ =p) and dots. It’s that simple!

Photobucket


Step 3
Now, you can create the ultimate leopard look by drawing little orange dots in the brown c’s.

Photobucket


Step 4
Finish with a shiny topcoat!


Hope I’ve made everything clear! If you have any questions, please ask!
Ow and when you have tried this look, please link me to that photo! so that I can be proud of your result! =D


Related Posts Plugin for WordPress, Blogger...